-
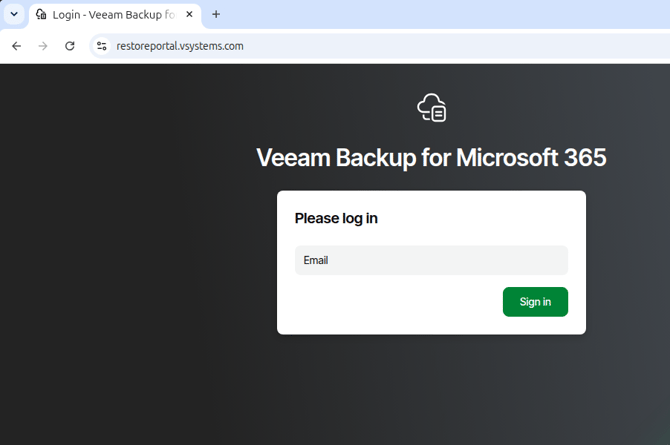
In a web browser, go to https://restoreportal.vsystems.com. Enter your Microsoft 365 username > click Sign In.
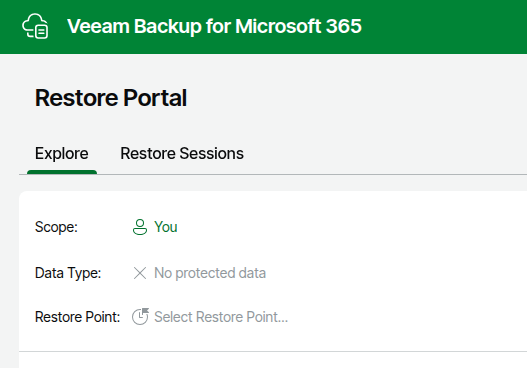
- After signing in, click on Click on You in the top left corner.
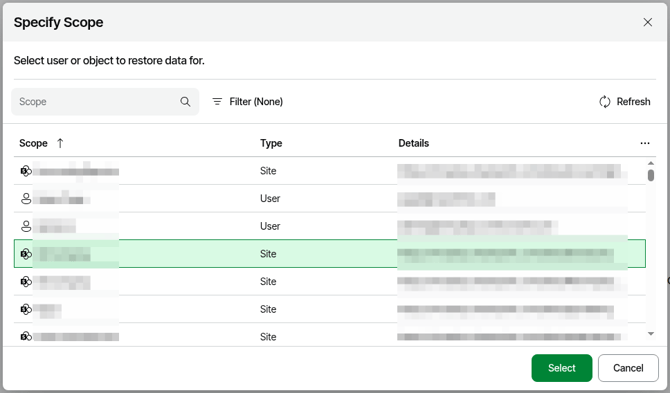
- This will bring up the Specify Scope window where you can select the user, site, or team that you want to restore data from. Once you have selected the user, site, or team, click Select.
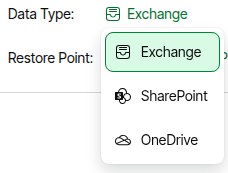
- If you choose a User or Site, click on the Data Type: field to select Exchange, SharePoint, or OneDrive. If you choose a Team, this will default to Teams.
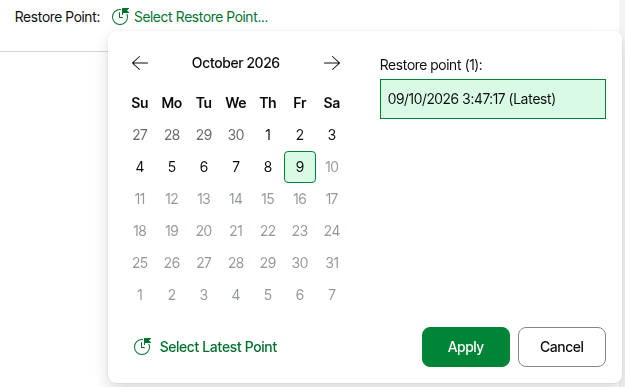
- Click on Select Restore Point... > select the date from the calendar you want to restore data from or to use the latest restore point, click Select Latest Restore Point. If there are multiple restore points on the selected date, you can select the desired restore point from the restore point pane on the right. Note the date is dd/mm/yyyy format. Once you have selected the desired restore point, click Apply.
- The Restore Point is loaded and after a few seconds, you will see the object that was selected for restore. Click the carat to expand the object in the left pane.
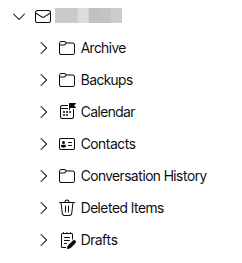
- Expand the items in the browser on the left column to find the item to restore. You can also use the Search bar to search for items. To start a restore, do one of the following:
- For a single item, click Restore.
- For multiple items, click Add to Restore List. The Restore List is like a shopping cart to find multiple items in multiple folders to restore all at once.
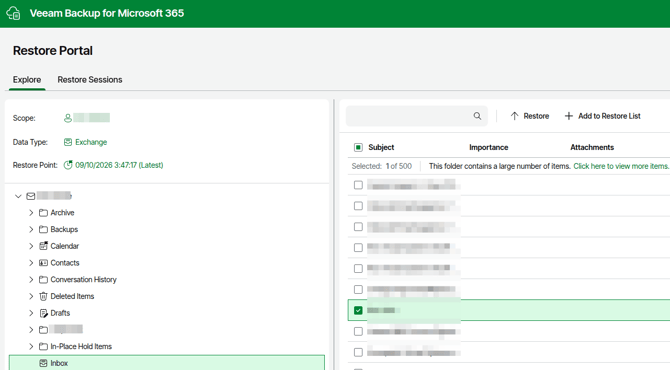
- The next step depends if restoring a single item or multiple items.
- For a single item, you are taken directly to the Exchange Restore page. On the Items page, confirm the item to restore is shown.
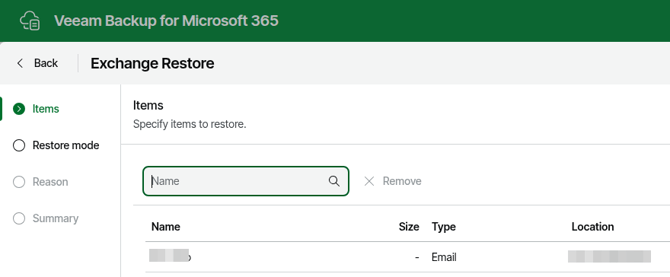
- For multiple items, click on Restore List tab. Check the Item box on Restore List tab > click Restore.
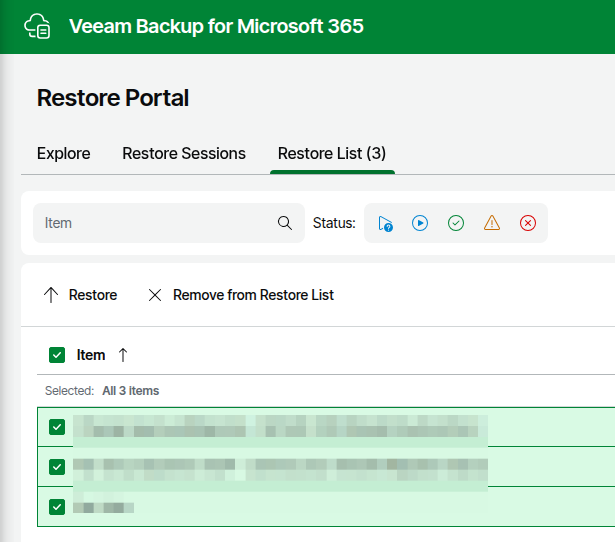
- For a single item, you are taken directly to the Exchange Restore page. On the Items page, confirm the item to restore is shown.
- At the bottom of the Exchange Restore - Items page, click Next.
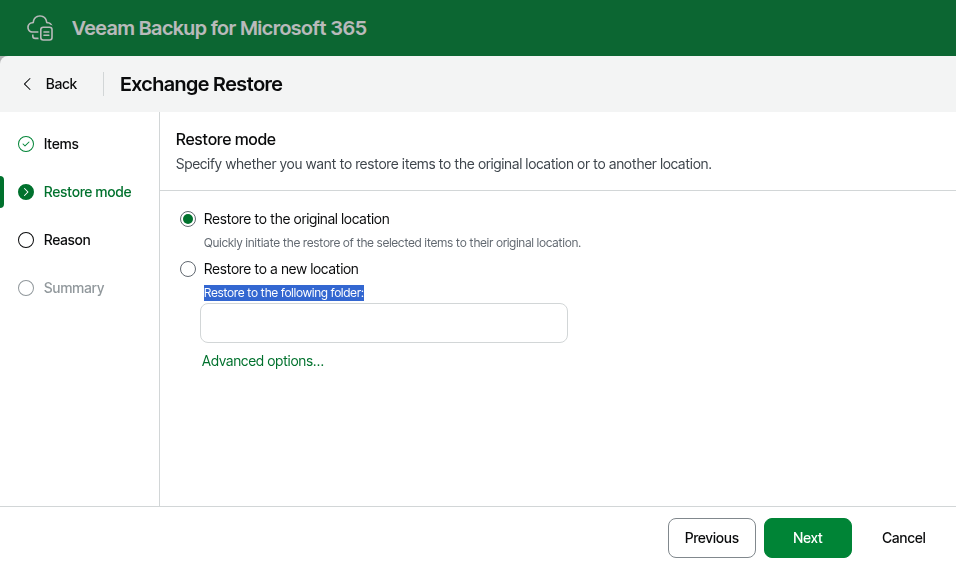
- On the Restore mode page, either select Restore to the original location or Restore to a new location.
- Restore to the original location - Quickly initiate the restore of the selected items to their original location.
- Restore to a new location - Enter the destination folder for the restored data.
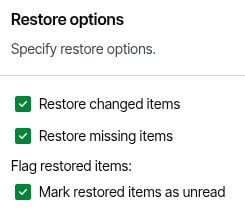
- The Advanced options allows checking options to Restore changed items, Restore missing items, and Mark restored items as unread. Once the desired selections are made, click Apply.
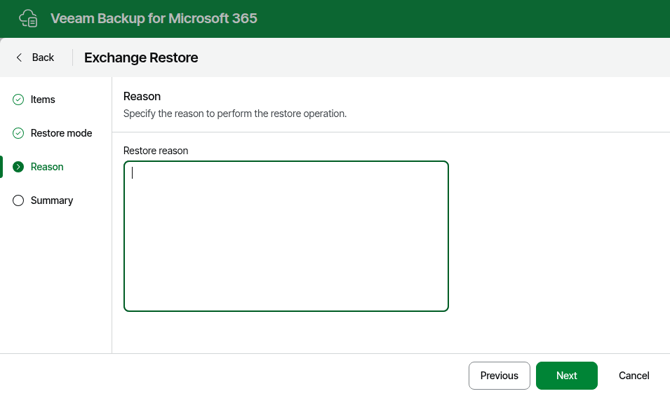
- On the Reason page, enter the reason for the restore > click Next.
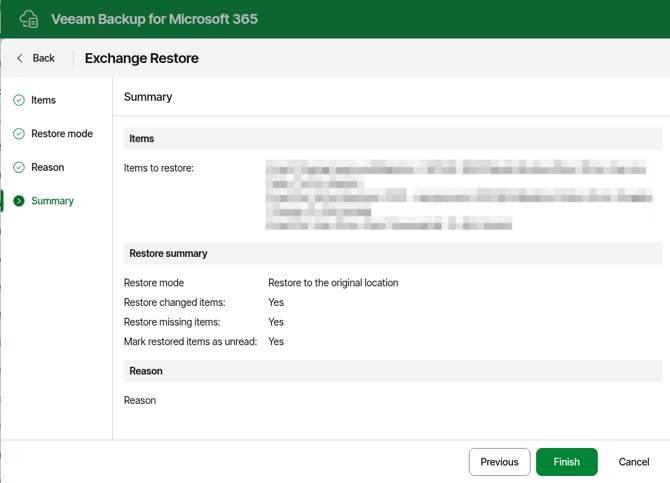
- On the Summary page, confirm the information displayed is correct and click Finish.
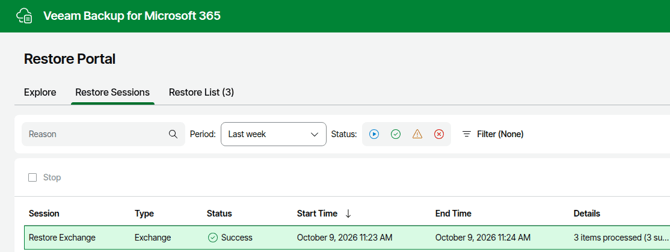
- Veeam Backup for M365 will create a restore session showing the status as Running in the Restore Sessions tab. Once the restore completes, you should see Success.
English
![VSystems_Decked_Grey_4col-1.png]](https://kb.vsystems.com/hs-fs/hubfs/VSystems_Decked_Grey_4col-1.png?height=40&name=VSystems_Decked_Grey_4col-1.png)